In June 2019 (WWDC 19) Apple announced that starting in April 2020 there will be a new requirement for Apps: you must use Xcode’s storyboard to create your splash screen. Over all the years I’ve used .xib files for splash screens and of course I thought there’s so much time to implement, put it on my ToDo … and finally forgot to change my apps.

Fortunately Apple gives you some more time:

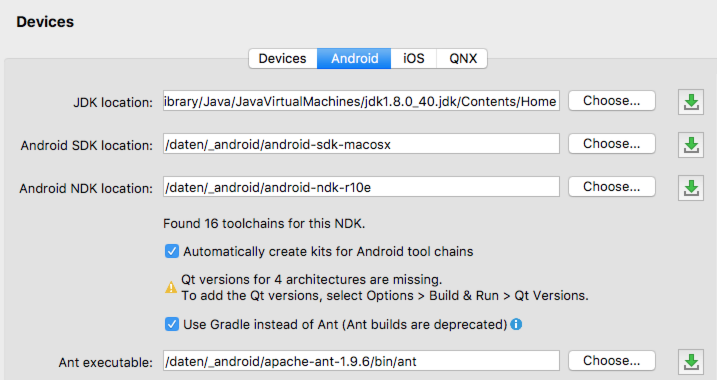
As you probably know I’m not a native iOS developer – I’m doing most of my work with Qt and only use Xcode to upload my apps to the store or export to enterprise customers.

Thx @grecko  and @Maciej Węglarczyk  for your help at QtMob

Found some useful blogs about storyboard splash screens:

But I didn’t found any documentation HowTo create a splash screen using Xcode’s storyboard and to integrate this into your Qt build workflow. In the end it was easier as I thought.

I’m always only using a very simple splash screen where I show my app logo centered. My Qt apps are starting extremely fast, so I don’t need more infos on my splash screen, because there’s not enough time to read some text or enjoy the design. If you take a look at the 2 blogs mentioned above you’ll find other ways do design the UI of your splash screen if a centered app logo isn’t enough.

Here’s a step-by-step guide to move your Qt projects from XIB to Storyboard:

Current Settings (xib)

From my info.plist Xcode know the name of my splash screen – in this case MyLaunchScreen.

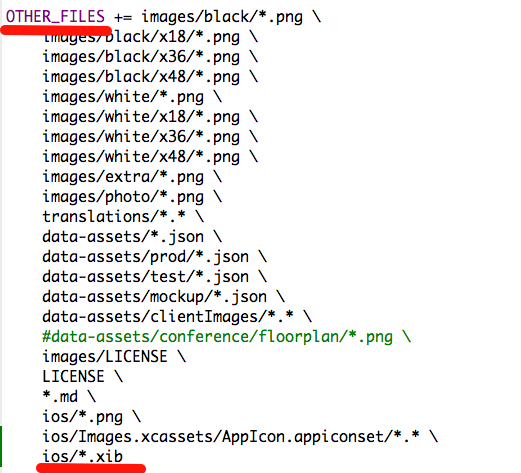
Here’s the ios part of my Qt project file (.pro) to let Qt know about the location and name of my launch screen MyLaunchScreen.xib.

I also placed the .xib location under OTHER_FILES to make the file visible in QtCreator Project Tree.

here’s the splash screen as part of QtC Project tree:

Splash Screen (.xib) in Xcode

Build your project with QtCreator and open your generated Xcode project:

You’ll find MyLaunchScreen.xib in Xcode under Project –> Bundle Data and also from General tab under App Icons and Launch Images, where MyLaunchScreen is placed without the .xib file extension-

Create a new Storyboard Splash Screen

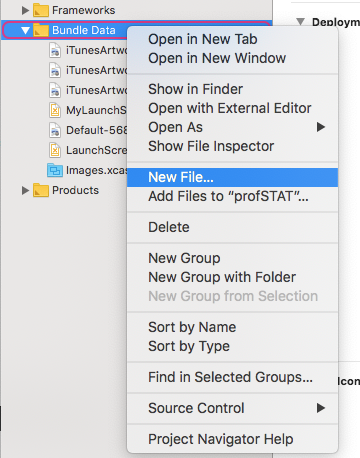
Now it’s time to create a new storyboard from Bundle Data –> New File:

Select Launch Screen:

Xcode wants to create a Launch Screen.storyboard inside your current Xcode project dir.

Attention: don’t store the storyboard at default location ! Building your project from QtCreator will delete the file if you clean the build dir from QtC.

I changed the filename to the same one I used before (MyLaunchScreen) – then I don’t have to change anything inside my info.plist where the LaunchScreen is defined without file extension. (Also I always try to avoid filenames with spaces inside)

As location I selected my Qt project directory and saved the new storyboard at the same location as the old .xib file:

Now inside Xcode the new storyboard was listed under Bundle Data besides the old .xib file:

Design your Storyboard Splash Screen

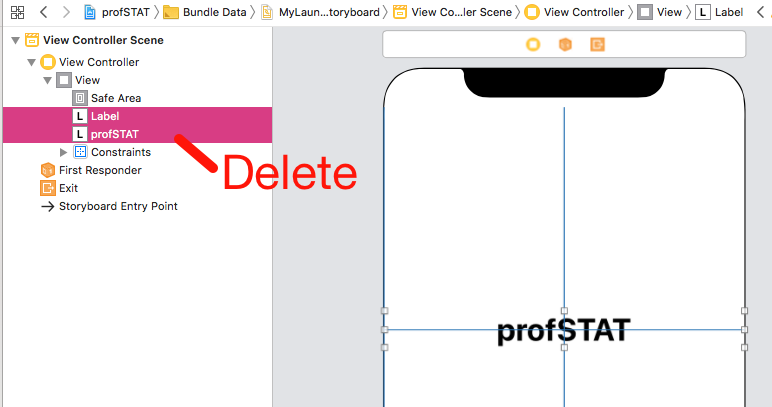
My splash screen only shows a centered app logo, so as first step I delete default Label and Text:

Now I want to add my app logo. One of the screenshots above with Xcode project tree shows the app logo:

your app –> Bundle Data:

  • iTunesArtwork@1.png
  • iTunesArtwork@2.png
  • iTunesArtwork@3.png

Please tap on the ‘+’ tab and drag one of the iTunesArtwork@x.png into the workspace.

Now you’ll see the image here:

View Controller Scene –> View –> xxx.png

At the right part you can see the defaults for this image. For me important: View –> Content Mode: Aspect Fit

As next please resize the Image so it fits into the iPhone screen:

now it looks better:

Of course it should look good on all iPhone- and iPad – sizes.

To guarantee this we have to add some constraints. My app logo should fill out the available space without borders, so I Add New Constraints (0 for top, bottom, left, right) – Remember: Aspect Fit is set as default, so nothing will be lost or stretched.

Tap on the 4 dotted lines to enable constraints for all directions:

Don’t forget to tap on the Add 4 Constraints button.

To verify if it works as expected, select different devices and orientations. Now the most work is done.

The good thing: this storyboard  uses an image with same name and location in all my projects: Bundle Data –> iTunesArtwork.png, so I can copy and re-use this storyboard.

Now back to QtCreator.

Change Projectfile (.pro)

As first step under OTHER_FILES I rename .xib into .storyboard:

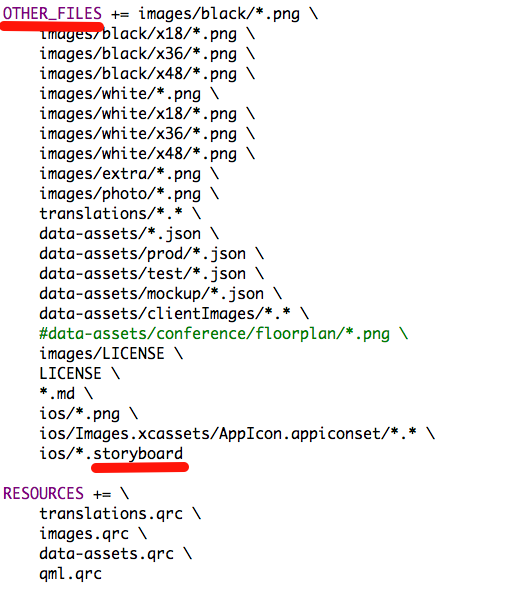
under iOS I rename MylaunchScreen.xib into MyLaunchScreen.storyboard:

Clean Project

Clean your project and delete the build dir, to see if all works as expected.

Save Changes (git)

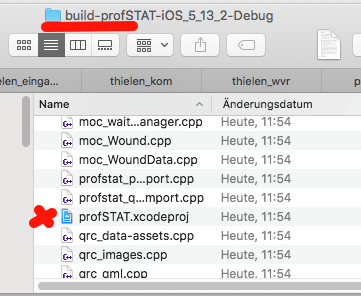
Let’s take a look at git to verify the changes you have done in your project. (see screenshot below)

now it’s easy to get the new storyboard splash screen into your other projects: just copy MyLaunchScreen.storyboard into the target project, delete the .xib file and do the changes inside .pro – that’s all !

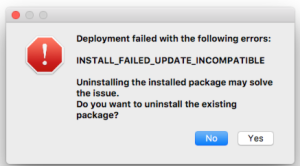
Build, Deploy, Test – Splash Screen not changed ?

Now you can build, deploy and enjoy your new splash screen.

uuups: there’s still the old splash screen ?

Go back to Xcode: there’s the new storyboard splash screen.

Attention: You probably run into a some-years-old-iOS-bug where iOS doesn’t detect the new splash screen and takes an old one from cache. Take a look at this discussion.

In most cases this helps for me:

  • delete app from iPhone / iPad
  • reboot device
  • install app again

Sometimes even this doesn’t work. But the most important thing: Apple is happy and you’ll get no problems uploading your app to AppStore, because you’re using a storyboard – even if iOS is still using the old one from cache 😉


Qt World Summit App at the App Stores

2019-10-21 can take some time until all is published to the stores !!!!

QtWS 2019 Conference App is now available at the stores.

Android 5.0 or greater for Phones and Tablets from Google Play Store:

google-play-badge

iOS 11.0 or greater for iPhone or iPads from Apple App Store:

app_Store_Badge

Sourcecode at Github: https://github.com/ekke/c2gQtWS_x

Some Screenshots

01_home_android

Schedule:

02_sessions_android

Speakers:

04_speaker_android

Session Detail

03_session_detail_android_part103_session_detail_android_part203_session_detail_android_part3

Room:

08_room_detail_android

Venue

09_venue_berlin_android

QtWS2019 in Tokyo:

12_tokyo_sessions_android13_tokyo_session_detail_android

08_venue_tokyo_ipad

xxx

Qt World Summit App at the App Stores

QtWS 2018 Conference App is now available at the stores.

Hint: Training Day Sessions are missed yet, but will follow soon. You’ll get them automatically from built-in Update Service.

Android 4.3 or greater for Phones and Tablets from Google Play Store:

google-play-badge

iOS 10.0 or greater for iPhone or iPads from Apple App Store:

app_Store_Badge

Sourcecode at Github: https://github.com/ekke/c2gQtWS_x

Some Screenshots

Screenshot_20181002-081328.png

Schedule:

Simulator Screen Shot - iPhone X - 2018-10-01 at 16.43.43.png

Speakers:

Simulator Screen Shot - iPhone 8 Plus - 2018-10-01 at 16.39.45.png

Session Detail

Simulator Screen Shot - iPhone 8 Plus - 2018-10-01 at 16.38.59.png

Room:

Simulator Screen Shot - iPhone X - 2018-10-01 at 16.44.31.png

xxx

Just updated Xcode and iOS ? Getting an error like this ?

Missing Info.plist value - A value for the Info.plist key 'CFBundleIconName' is missing in the bundle 'xxxxxxxxxxxxxxx'. Apps built with iOS 11 or later SDK must supply app icons in an asset catalog and must also provide a value for this Info.plist key. For more information see http://help.apple.com/xcode/mac/current/#/dev10510b1f7.

Starting with Xcode 9 your App icons must be provided as part of your asset catalog.

Don’t worry – QtCreator helps you to manage this.

Thx @jakepetroules and @cpluke for your help at QtMob

Create Asset Catalog for your App Icons

The only thing you need is an App Icon in 1024×1024 px

Open this FREE service: https://www.appicon.build/

Drag your AppIcon onto this site and get an email with all recommended sizes – something like this:

  • AppIcon.appiconset
    • Contents.json
    • *.png

Contents.json contains all instructions Xcode needs to know HowTo use your icon files.

Hint: For me this worked only using Safari – not from Firefox.

Add AppIcons to your Qt Project

I’m always using a project structure like this

  • ProjectFolder
    • ios
      • info.plist
      • *.png

Remove all your App Icon .png and create a new folder ‘Images.xcassets’ and place your AppIcon.appiconset folder into the Images.xcassets folder:

  • ProjectFolder
    •  ios
      • info.plist
      • Images.xcassets
        • AppIcon.appiconset
          • Contents.json
          • *.png


Edit your info.plist

Remove these keys:

 <key>CFBundleIconFile</key>
 <key>CFBundleIcons</key>

Edit yourproject.pro

Remove the lines where you added your icons to the bundle data and insert under ios {…}:

 QMAKE_ASSET_CATALOGS = $$PWD/ios/Images.xcassets
 QMAKE_ASSET_CATALOGS_APP_ICON = "AppIcon"

The first entry points to your Images.xcassets folder, the second one tells QMAKE that your appiconset is prefixed with AppIcon.

That’s all: now you can compile and run your project using Xcode9 on iOS11 devices.

Hint: perhaps you already used an asset catalog before and still getting an error ?

There’s a new AppIcon size of 1024×1024 required:

{
 "size" : "1024x1024",
 "idiom" : "ios-marketing",
 "filename" : "Icon-App-1024x1024@1x.png",
 "scale" : "1x"
}

Ignore

In one of my projects suddenly at root of the project this file was created:

asset_catalog_compiler.Info.plist

This is a temporary intermediate file, so it’s safe to add it to your .gitignore

Since more then 30 years I’m developing business solutions for SMP and Enterprise, where the last 8 years I’m focused on mobile APP development.

There are many challenges to master while developing mobile APPs for different platforms (Android, iOS, Windows 10 mobile, BlackBerry10) and there are many frameworks out there to do this (Angular, Ionic, React Native, Xamarin, Qt, …). The decision about the right framework for more complicated and complex mobile business APPs isn’t easy. You’ll find small example apps and all looks good. Then you start with your project and some weeks or months later you reach the limits, performance goes down, APP becomes instable and you’re in real trouble.

I went through all of this and finally found the best framework for my APPs: Qt. Yes – Qt is an ‘old’ framework and exists since more then 20 years, but Qt 2017 isn’t the same as Qt 1990. Qt covers development for desktop, mobile or embedded APPs and provides QtQuick, QtWidgets and the new QtQuickControls2. QtQuickControls2 are not an update of QtQuick, but a complete new framework and from my experiences last 2 years I must say: you can develop very performant stable mobile APPs with NO LIMITS.

Most of my business applications are running hidden at customer site and I cannot talk about. That’s the reason why I’m developing example apps and from time to time conference apps. Last year I developed the Qt World Summit Conference APP – this year the Conference APP is built by V-Play – another way to develop mobile APPs with Qt. Christian Feldbacher is talking about V-Play APPs at Qt World Summit.

ProfSys ambulant (outbound services)

ProfSys stationär (inbound services)

This doesn’t mean that I was lazy 😉 I was heavy working on one of my more complex mobile Business APPs: ProfSys – an APP to support Care Services (outbound and inbound) and I’m glad to present this APP at Qt World Summit 2017 in Berlin. Knowing that thousands of Care-Services-employees are running the APP successfully for their daily work is great. There will be two sessions:

Roland will talk about the Business aspects and I will talk about the development and give some tips and tricks.

See what can be done with QtQuickControls2 for mobile APP development.

Looking foward to meet you at QtWorldSummit2017 in Berlin or at W-JAX in Munich where I’m talking about Bluetooth LE and mobile business APPs.


Bluetooth LE for mobile Business APPs

As you know I’m developing mobile business apps for Enterprises and SMBs. There are many use-cases where Bluetooth LE (BTLE) devices can help to streamline the workflow. Last years I already have done some BT LE powered APPs on BlackBerry 10.

In the meantime BlackBerry devices are running Android and most of my enterprise customers are moving from BB10 to Android, some to iOS, some both.

Thanks to QtQuickControls2 I found my way into Android and iOS development using Qt.

After some weeks of exploring and developing I’m happy what can be done with Qt for BT LE APPs on Android and iOS. A big thx to all the Qt developers !

There are also some Bluetooth LE Example APPs avilable: http://doc.qt.io/qt-5/qtbluetooth-index.html#examples

What was missed ? A real-life APP built with QtQuickControls2.

To help others and to be able to demo features to customers I decided to develop a BTLE example APP and to make it open source at Github.

The good thing to have this app: it’s now easier for me to test the features inside a special APP instead inside more complex mobile business APPs I’m normaly working on 😉

ekkes BTLE example

  • finds BT LE devices nearby
  • lets you explore Services and Characteristics and try out Read, Write, Notify
  • covers all errors and signals to get a robust APP. if you run into an issue please let me know
  • for known Device Types (Addimat Lock, NFC Reader, HeartRate Monitor)
    • remembers last used device address to auto-connect after restart APP
    • allows to connect to more then one BT LE Devices: per ex. get Notifications from Lock and NFC Reader at the same time
    • provides settings for Battery Level and more
    • enables mapping of users / persons to Lock Key or NFC Tag
    • manages detailed states: connect / all needed services + characteristics available / disconnect
    • easy re-connect

I’ll divide this article into 2 parts:

  1. documentation and screenshots HowTo USE the APP
  2. analyzing APP project structure and src and HowTo port BT functionality into your own app

The 2nd part will take some time, because I’m heavy loaded with customer projects.

Meet ekke at Conferences

I’ll speak about more complex mobile business APPs at Qt World Summit 2017 in Berlin

You are from Germany ? Don’t miss my talk at W-JAX: Bluetooth LE in mobile Business Apps

Thx John and Martin

Before starting with the first part I have to thank John Murray and Martin Woolley. John and Martin helped me to master first steps into Bluetooth and NFC on BlackBerry 10 / Cascades (Qt 4.8).

Download from the Stores

Run on Android 4.3 or greater for Phones and Tablets from Google Play Store:

google-play-badge

Run on iOS 8.2 or greater for iPhone or iPads from Apple App Store:

app_Store_Badge

Run on Amazon Fire OS from Amazon App Store:

amazonappsbadge

Here‘s the link to german Amazon App Store:

ekkes BTLE example APP

This APP uses same customized QtQuickControls2 as my other demo APPs, also same Images and follows same project rules.


Besides the Drawer Navigation there’s a Bottom Navigation Bar for easy access to the most important parts of the APP.

Here’s the Drawer:

  • wondering about the gray area where normaly it’s only dimmed so you can see what’s behind ? This is because of workarounding a Qt 5.9 Bug.

APP Features and Devices

  • Scanner (discover devices nearby, explore Services and Characteristics
  • HeartRate (HeartRate Monitor)
  • Lock (Waiter Lock with magentic keys)
  • NFC Tag (NFC Reader via BT LE)
  • Help Page
  • About Page

Main goal of this APP is to help other devs with Qt BT LE for mobile. All sources are available at Github.

ekkes BTLE example APP is also my workbench testing new Device Types and HowTo integrate into my apps.

As first I included a HeartRate Monitor, because I could compare what happens from existing Qt BT LE example apps.

Then I added Addimat Lock

Probably you have seen something like this at Restaurants where waiters Log-In / out at Cash Register using magnetic keys.

Some of my customers are using Addimat Lock for Teams sharing an Android Tablet or iPad.

Each key has a unique ID and is mapped to the User. Now switching between users is fast and secure.

Most Locks are only connected via USB or RS232 – so I was happy to find Addimat with Bluetooth LE Custom Services.

Hint: It’s important to use a Custom Service and not connect as a HID (like BT Keyboards) because then under iOS the virtual keyboard disappears.

More Info on Addimat can be found here.

As next I added a NFC Reader

NFC Tags are used per ex. to identify attendees of Conferences / Events / Trainings:

NFC works well on most Android Smartphones with an integrated NFC chip. But when it comes to Tablets even high end Tablets as Goggle Pixel C miss the NFC Chip. iOS devices have a NFC Chip integrated, but Apple blocked acces for developers in the past. Starting with iOS11 developers get partly access to NFC Tags: you can read NDEF Records etc. But in all business APPs I developed last years where NFC was used to identify persons or locations, only the UUID was used.

So for some customers looking for a way to register from a mobile device perhaps an extra NFC Reader conencted via Bluetooth LE is the only solution.

Finally I found a device with some help from CSG:

NFC Reader can be customized and integrated into custom cases.


Android, iOS, Smartphones, Tablets

The APP is running on Android Smartphones and Android Tablets.

Screenshot from Google Pixel C Tablet:

Using NFC Reader you add NFC to high end Google Pixel C Tablet


Screenshot Amazon Fire HD8 Tablet:

ekkes BTLE example also is running on iOS.

Screenshot from iPhone:

and Screenshot from iPad Mini2:

Discover and explore BT LE devices

Hint: Beacons are not supported yet – have to learn HowTo deal with Beacons from Qt.

Selecting first time the Scanner, ekkes BTLE example APP discovers all BT LE devices nearby. While searching for devices there’s a progress view. (see Fire HD 8 screenshot above). Your devices isn’t listed ? Switch it off and on – this helps in most cases. Then hit theblue ‘+‘ Button to discover again and add devices currently not listed. Tap on the red ‘x‘ Button to clear the list and start again.

In the list you get: RSSI, name, MAC Address and current state.

From the list you can Connect or Disconnect devices – tapping on a row will give you a Popup Menu:

First option “Select” is only available for known device types (HeartRate, Lock, NFC Reader).

Tapping on “Select” will select this device as your default device, store MAC address in settings, open the special Page and do a Connect.

“Explore Services” opens a detail Page wit all the Services.

“Connect / Disconnect” does exactly this

Explore Services

Here are all Services found for Addimat Lock:

You get the name and Service UUID. Tap on a row to see the Characteristics of this Service.

Characteristics

Battery Level Characteristics from Addimat Lock:

Battery Level Value can be Read.

Characteristics of Addimat Custom Services:

Custom Characteristics can be Read to get the current Value or you can subscribe for notifications.

Tap on a row to see the details or to interact:

Tap on the red “R” Button to read the current value.

Tap on the red “N” Button to subscribe to the values. There’s a switch if all values should be collected or if you only want to see the last one.

ekkes BTLE example APP displays values as String, HEX or INT. Please take a look at the documentation of your device or Bluetooth GATT service. Sometime values are not human readable and must be analyzed by some business logic.

If a Characteristic has “Write” permissions you’ll see a “W” Button. Tapping on the “W” allows you to enter String or HEX values and to write to the Device:

HeartRate Monitor

Selecting a HR Device a special Page opens:

The header shows you name, MAC address and state and you can Connect, Initialize Services or Disconnect from there.

The “Play” Button subscribes Notifications and you’ll see the HR values:

Addimat Lock Manager

Addimat Manager Page works similar.

Attention: Addimat Lock can work as HID or as BT LE with custom Service. iOS doesn’t know about the custom BT LE Service, so every time you connect to Addimat, iOS tries to connect as HID. There’s an easy way to get rid of this message:

First time enter 307630:

Then open Addimat from Settings – Bluetooth and tap in ‘I’:

Then tap on “Ignore Device”:

Now Addimat is only used as a BT LE Device with custom Services and Characteristics.

Here the Notifications about magnetic keys plugged-in or out are already subscribed (Progress Bar is running):

No User was found for this Addimat Key. In a real-life app you would check the ID against a REST service or a local database.

To simulate this you can add the Mapping between Key ID and User.

Please open ‘Mapping’ from “Settings Menu”:

While the Configure – Popup is open, the values from the keys are still received, but now the APP knows that you’re configuring and you can enter the Name. Do this for all your Keys. (In a real life APP this would be done at Server site and the APP does a Login with Key ID as credentials)

Next time you plug-in the Key, ekkes BTLE example APP “knows” the user:

Select “Settings” from Menu above to see the default device address or to change battery levels:

ekkes BTLE example APP notifies you if the device is disconnected:

NFC Reader

Here’s the NFC Reader Page – Notifications are subscribed to get the NFC Tag IDs:

NFC Reader allows you to “Write” values to the buzzer and LED. Commands Buttons “BUZZER” and “LED” lets you test this.

Here’s the Menu you get from “Buzzer”:

and here’s the Menu you get from “LED”.

ekkes BTLE example APP also uses the LED: if a Tag ID was found, the LED becomes green, if not the LED becomes red.

You can map the NFC Tag IDs same way as for the Addimat magnetic Keys:

Holding the NFC Tag on the NFC Reader, ekkes BTLE example APP welcomes the attendee:


stay tuned for part 2 of the documentation where I’ll explain project structure and source code.

Open Source

All sources are available at GitHub: https://github.com/ekke/ekkesBTLEexample


Please read at first my blog HowTo install Qt 5.9.

Here are some issues and workarounds I found out while testing my apps under 5.9


Update QML Imports

This is always the first step after moving a project from 5.8 to 5.9: I’m updating the QML Imports.

From a technical point you can use the ‘old’ imports. I’m always doing search/replace to update the imports. Then I’m sure all my QML files are accessing the newest Controls and Properties. Updating from  5.8 to 5.9 I replaced

import QtQuick 2.8
import QtQuick.Controls 2.1
import QtQuick.Controls.Material 2.1

with

import QtQuick 2.9
import QtQuick.Controls 2.2
import QtQuick.Controls.Material 2.2

You can see the newest imports here.

Using a source control system like Git it’s a good idea to do this in an extra Branch – then it’s easier to go back if something went wrong.


Drawer ignores taps outside the Drawer

Normaly if you opened a Drawer you can tap outside the Drawer to close. This works well up to 5.8.

Under 5.9 there’s a bug:

tapping outside the Drawer not always closes the Drawer.

This would be no big problem because you can drag the Drawer back or click inside the Drawer.

Unfortunately the Drawer ignores the Tap to close but the underlying (dimmed) Page gets touch events so users can by accident do something unwanted.

I opened QTBUG-61581.

I found a workaround to block those unwanted touch events on the Pages below the Drawer by inserting another Popup between Drawer und Pages below. looks ugly but it works in the meantime. The bug is classified as P1 so hopefully will be fixed soon.

Drawer {
    id: myDrawer
    z: 1
    ....
    // workaround:
    onOpened: {
        fakePopup.open()
    }
    onAboutToHide: {
        fakePopup.close()
    }
    Popup {
        id: fakePopup
        z: 0
        width: appWindow.width
        height: appWindow.height
    }
    // end workaround


Bug is only on Android and iOS – tested from macOS: MouseClick is working.

MonthGrid onClicked gets no events

I’m using MonthGrid as part of my DatePicker.

Works well up to 5.8 but now under 5.9 I’m getting no clicked events.

I opened QTBUG-61585. and also found an easy workaround: I added a MouseArea:

ApplicationWindow {
    visible: true
    width: 640
    height: 480
    title: qsTr("Hello World")
    id: appWindow

    Page {
        id: myPage

        GridLayout {
            columns: 3
            rows: 5
            width: appWindow.width
            height: appWindow.height

            MonthGrid {
                id: monthGrid
                Layout.fillHeight: true
                Layout.fillWidth: true

                onClicked: {
                    console.log("tapped on a date ")
                }

                delegate: Label {
                    id: dayLabel
                    text: model.day
                    font.bold: model.today? true: false
                    opacity: model.month === monthGrid.month ? 1 : 0
                    color: pressed ? Material.foreground : model.today ? Material.accent : Material.foreground
                    minimumPointSize: 8
                    fontSizeMode: Text.Fit
                    horizontalAlignment: Text.AlignHCenter
                    verticalAlignment: Text.AlignVCenter

                    background: Rectangle {
                        anchors.centerIn: parent
                        width: Math.min(parent.width, parent.height) * 1.2
                        height: width
                        radius: width / 2
                        color: Material.primary
                        visible: pressed
                    }
//                    MouseArea {
//                        anchors.fill: parent
//                        onClicked: {
//                            console.log("mouse area click")
//                        }
//                    } // mouse
                } // label in month grid

            } // month grid
        } // grid layout
    } // myPage
} // app window

Bug is only on Android and iOS – tested from macOS: MouseClick is working.

iOS Release Build: getting thousands of Warnings

While testing my APPs under 5.9 I noticed a strange behavior while doing a RELEASE build for iOS.

I’m getting many Warnings:

With some help from Jake Petroules I found a workaround:

ios {
...
 disable_warning.name = GCC_WARN_64_TO_32_BIT_CONVERSION
 disable_warning.value = NO
 QMAKE_MAC_XCODE_SETTINGS += disable_warning
...
}

I opened QTBUG-61587.

iOS: isOnline() not reliable from QNCM

Under Android it’s easy to know if the device is online: QNetworkConfigurationManager is your friend:

    mNetworkConfigManager = new QNetworkConfigurationManager(this);
    qDebug() << "INIT IS   O N L I N E ?" << mNetworkConfigManager->isOnline();

Up to iOS 10.2.1 with a little trick QNCM also could be used by observing active configurations and filter out a config with name “utun0”.

Now with iOS 10.3.2 I had devices also reporting an active configuration ‘en2’ even if iPhone was in airplane mode.

It’s better to rely on Apple’s Reachability Class.

see also QTBUG-56151 and this great article about “CheckingNetwork Status in iOS

here’s my workaround by including Reachability:

Download sources from attachment to bugreport.

Copy Reachability classes to <project>/ios/src

Change your .pro:

LIBS += -framework SystemConfiguration
....
ios {
 OBJECTIVE_SOURCES += ios/src/Reachability.mm \
 ios/src/ReachabilityListener.mm
...
}

add this include

#if defined (Q_OS_IOS)
#include "ios/src/ReachabilityListener.h"
#endif

change class definition:

class YourClass : public QObject
#if defined (Q_OS_IOS)
 , private utility::ReachabilityDelegate
#endif

add a statusChanged method:

#if defined (Q_OS_IOS)
void DataServer::statusChanged(utility::NetworkStatus newStatus)
{
 if (newStatus == utility::NotReachable) {
 // offline
 } else {
 // online
 }
}
#endif

Now you’re getting events if online state is changing on iOS devices.

At startup you can check the current state:

qDebug() << "I O S REACHABILITY: INIT IS O N L I N E ?" << status() != utility::NotReachable;

if you need some more informations you can check for different states:

#if defined (Q_OS_IOS)
    switch (status()) {
    case utility::NotReachable:
        networkInfo.append(tr("Internet not reachable"));
        break;
    case utility::ReachableViaWiFi:
        networkInfo.append(tr("WiFi internet connection"));
        break;
    case utility::ReachableViaWWAN:
        networkInfo.append(tr("mobile data internet connection"));
        break;
    default:
        break;
    }
#endif

This was the first time ever I’m using a ObjectiveC class 😉

I got warnings from Reachability.mm about unused parameters.

you can suppress these warnings by adding #pragma unused(theName)

static void PrintReachabilityFlags(SCNetworkReachabilityFlags flags, const char* comment)
{
#pragma unused(flags)
#pragma unused(comment)
#if kShouldPrintReachabilityFlags

Have tested Reachability under different situations at customer site and it’s working great.


Updating from 5.8 to 5.9 was easier and has less issues as my last update from 5.7 to 5.8

I’ll tweet @ekkescorner if finding more issues while working on my apps. Also I have to check all the issues I reported from 5.8 which ones are solved and which are still open.


← Back (Install Qt 5.9)

→ Next Article (Qt Creator Intro)

⇐ Home (Overview / Topics)


Install Qt 5.9

June 23, 2017 — 1 Comment

Qt 5.9 Release Blog from Qt

Qt Quick Controls 2 Blog from Qt

This blog series is about the new Qt Quick Controls 2 to develop mobile apps for Android and iOS.

Before going on you should have read my blog – esp. on ‘Prepare for Android / iOS‘ and ‘Prepare Devices

Besides Qt 5.9 you’ll also get a new Qt Creator 4.3

Perhaps you already have an older version of Qt already installed, you can use the Maintenance Tool to update. I’m always doing a fresh install for each Beta, RC or Release.

Before downloading and installing you should know if you want to install the Open Source or Commercial version of Qt for Application Development.

Please take a look at Qt FAQ‘s and also my blog post about licensing and the new license for small Startups and Independent Developers.

I’m using the Commercial version for Startups – see Qt’s offer here: https://www.qt.io/start-up-plan/

Read more about Open Source vs Commercial also in my blog about ‘Install Qt 5.6


Here are my steps to download and install Qt 5.9 (commercial):

Install Qt 5.9

Go to your Qt Account – Downloads and select the Qt Online Installer:

01_download_01


See available downloads:


I selected the macOS online installer:


Here’s my download on OSX:


Double click to install:


Log into your Account:


Select the folder where to install:


It’s a good idea to use installation pathes without spaces. see also here.

As next select your components:

accept the license:


and wait for the installer:


If Installer finished, I’m not launching Qt Creator yet.


Start Qt Creator with -settingsPath

All Qt Creator instances by default share the settings. Having the new Qt Creator 4.3 and old 4.2.1, 4.0.2, 3.6.2 using the same settings is no good idea. Also I want to use different working directories for my Qt 5.6, 5.7, 5.8 and the new Qt 5.9 Release.

You can start Qt Creator with parameter -settingsPath – here’s HowTo do this from OSX:

Search for the Qt Creator.app from Qt 5.9 and do a right-click on the app. Here’s the content:


rename Qt Creator to something like Qt Creator-bin:


From a Text Editor create a Script to execute the Qt Creator-bin with a parameter.

something like this:

#!/bin/sh
exec "/daten/_qt_sdks/sdk_590/Qt Creator.app/Contents/MacOS/Qt Creator-bin" -settingspath /daten/_qt_sdks/sdk_590/qtc_settings "$@"

Save this file named “Qt Creator” besides the Qt Creator-bin:


Now you can start Qt Creator, which will execute the script:


Qt Creator will create the QtProject folder to store all the configuration settings.

Now you can start multiple Qt Creator versions without any collision.

Qt Creator 4.3

At first I’m changing QtCreator’s language on my german MacBookPro to english and restart


Qt Creator Preferences Working Directory

Set your working directory for 5.9, if you are using different directories as I’m doing:


Qt Creator Preferences Android

Take a look at your Devcies -> Android preferences:


Select your SDK and NDK locations and check ‘Gradle’:


Important: Don’t use a newer NDK ! Please always use r10e because of some trouble with the newer ones.


Qt Creator External Tools

Translations

I’m developing business apps and business apps always need support of languages (i18n). Configuring the External Tools for Linguist (Qt’s Tool to translate text from your QML and C++ sources) will make it more comfortable.

As first step we’ll add the Linguist App.You’ll find the Linguist at 5.8 –> clang_64 –> bin:


I like to use Tools in english, but the language cannot be changed yet for Linguist, so the trick is to rename the translations file, which in my case is 5.9 –> clang_64 –> translations –> linguist_de.qm:


Under Preferences –> Environment –> External Tools there already exist access to commands for lupdate and lrelease. (lupdate is looking for the strings you marked as translatable and to create or update the translation files <app>.ts. Using Linguist or external tools you can then translate the strings. lrelease compiles these translations from *.ts into *.qm. Only *.qml files will be deployed to your device)

I found out that the default configuration doesn’t work on Android and iOS – so I’m using the executable from …/5.9/clang_64/bin:


Test if Linguist will start. From External Tools

06_qtc_ext_tools_06

Linguist should start:


it’s a good idea to use a shortcut:

Refresh .pro

Adding new QML files to a project doesn’t refresh the project view automatically. Open the .pro change something, close .pro updates project folders.

I wanted to do this by a shortcut. The trick is to execute a script to “touch” the .pro file.

for OSX the script looks like this:

#!/bin/sh

# *****************
# External Tool for QT Creator.
# Touches the projects PRO file to trigger an IDE refresh after adding new files
# *****************

echo ""
echo "*** Touches the projects PRO file to trigger an IDE refresh after adding new files ***"
echo ""

proFilePath=$1

if [ -f "$proFilePath" ]
then
	now=$(date "+%Y%m%d%H%M")
	echo "Touching file on path: '$proFilePath' now... Setting the current time to '$now'"
	touch -mt $now $proFilePath
	echo "FINISHED!"
else
	echo "ERROR File under give path '$proFilePath' not found!!!"
fi


and here’s the shortcut:

Run Android for Work APPs

Some of my mobile business apps are installed on customers mobile management systems (BlackBerry UEM 12.6 or so) and deployed as ‘AndroidForWork’ APPs. see also my blog here. Unfortunately Qt Creator doesn’t support setting the user id, so after debug/run on device I have to stop the deployed App using the default user and start the same app for another (AndroidForWork) user.

I created external commands for those projects and execute from External tools.

Here’s an example script on OSX:

#!/bin/sh

# *****************
# External Tool for QT Creator.
# Runs the APP as work APP
# *****************

cd /daten/_android/android-sdk-macosx/platform-tools
./adb shell pm clear --user 0 org.ekkescorner.enbw.pegelmeter.dev
# doesn't close the app ./adb shell am force-stop --user 0 org.ekkescorner.enbw.pegelmeter.dev
./adb shell am start --user 10 -n org.ekkescorner.enbw.pegelmeter.dev/org.qtproject.qt5.android.bindings.QtActivity

and here’s the external tool i created:

Manage Qt Creator Plugins

Qt Creator has many Plugins installed as default.

It’s a good idea to disable Plugins you’re not using.

per ex. I manage all my Git repos using GitTower and I don’t want always to be asked about my source repo:

Open the list of Qt Creator Plugins:

then uncheck all unwanted Version Controls:

you can do the same with the unused Devices:

Restart Qt Creator.

Create a new QtQuickControls2 Project

Now verify if all is correct configured. easiest way is to create a new QtQuickControls2 APP and let it run on your devices.

From Welcome Tab click on “New Project” and select Application –> QtQuickControls2 Application:

give it a name and create in your workspace:

Select the build system: qmake

Select the QQC2 style. I’m using the Material style. This will create a config file. (There are other ways to set styles and colors)

Select the Kits you need. I’m developing mobile apps for Android and iOS and always testing on real devices.

Also for testing without deploying on devices I always add the Desktop Kit.

Qt 5.9 brings a cool new feature for iOS.

You can select the Development Team directly from Project Settings for iOS:

Now try the different Kits. Select the Kit, the Debug Build and hit “Run”:

Running on a connected Android Device the devices should be listed:

same is for iOS: you should see your connected devices:

I not only updated from Qt 5.8 to Qt 5.9, but also OSX 10.11.6 to macOS 10.12.5, Xcode from 8.2 to 8.3.3, iOS from 10.2.1 to 10.3.2 and my first try to run on an iOS device brings this error:

You can easy fix this. Go to Xcode 8.3.3, right-click to see the content:

duplicate the 10.3.1 folder and rename to 10.3 or create a symbolic link.

see more details at QTCREATORBUG-18380


Gallery Qt Quick Controls 2

Best way to get a first impression of all the new QtQuick Controls 2 is to run the Quick Controls 2 Gallery App.

From Overview – Examples search for “Gallery” and select the right one:


… and run the Gallery App:


Congrats –  you have installed Qt 5.9.  Now you can try out all the new Controls.

If you already have projects using Qt 5.8 – take a look what’s good to know if moving projects from 5.8 to 5.9

New to Qt for mobile ? Here are some more appetizers:

Clone my Examples from Github and Run

  1. First app with One Page
  2. StackView
  3. SwipeView
  4. TabBar
  5. Bottom Navigation
  6. Drawer Navigation

Please follow my blog series: https://appbus.wordpress.com/category/qt-for-mobile/overview/


← Back (Qt Community (Wiki, Forum, Lists))

→ Next Article (Issues and Workarounds: 5.8–> 5.9)

⇐ Home (Overview / Topics)

Qt 5.8 brings some more support of Text Selection Handles, but there are still also some problems. Text Selection Handles are important to make it easy on touch devices to insert text, copy text, replace text or cut text. With 5.7 single taps to get a handle to move the insert position around already works.

Select words by double tap

Qt 5.8 also supports double tap to select words – but it doesn’t work as expected. This selection mode will only be enabled if you set

selectByMouse: true

on TextField or TextArea. This works fine with TextFields, but having TextArea inside Flickable makes scrolling difficult or impossible. Qt doesn’t know if you want to change the selection or scroll inside the TextField or scroll the Page. Users will be confused and it’s not easy to know where outside the Textfield scrolling works. Hopefully in Qt 5.9 this will befixed and double tap works without setting ‘selectByMouse’.

One of my app contains many TextAreas and users are waiting for word-selection-mode, so I developed some workarounds for 5.8.

To make it easier to distinguish where’s the TextArea I placed the TextArea on top of a Pane. Now you can tell your user to scroll the Page place fingers outside the TextArea:

As soon as TextArea gets active focus, 3 buttons will appear on the right side:

  • clear
  • toggle selection mode
  • done

As soon as the user does a double-tap on a word both text selection handlers become visible and it’s easy to move them around to select more or less.

Also please notice on top a menu to select all, cut, copy and paste.

On iOS this is different: at first do the double tap to select a word – then please do a long press on the selection to get a cut, copy, paste, delete menu just on top of the selection:

Single tap does work with or without setting ‘selectByMouse’:

To insert from clipboard do a long-press: ‘insert’ menu appears on top of cursor position.

Tap on the Toggle Button to set selectByMouse = false to make it easier to scroll also while inside the Textfield.

When you’re ready with text editing tap on the ‘Done’ Button. Done Button gets focus and all Handles disappear. Also Done and Toggle Button disappear.

As long as there’s some text, the clear Button makes it easy to clear the field:

Here’s the workaround. I placed all of this into ‘TextAreaRow.qml’ – then it will be easy to change when 5.9 comes out.

TextAreaRow{
    id: remarksTextRow
    placeholderText: qsTr("Your Remarks (RETURN for new line)")
    text: tourDetail.remark
    onTextChanged: {
        tourDetail.remark = text
    }
    onDone: {
        // do something: set active focus to another field or so
    }
} // remarksTextRow

And here’s the implementation:

RowLayout {
    id: theTextRow
    signal done()
    property alias text: theTextField.text
    property alias placeholderText: theTextField.placeholderText
    property alias textField: theTextField
    property int minHeightTextPane: 140
    property bool doubleTapIsDefault: true
    Pane {
        id: textPane
        anchors.top: parent.top
        Material.elevation: 6
        Layout.fillWidth: true
        Layout.minimumHeight: theTextField.activeFocus? minHeightTextPane : 60
        TextArea {
            id: theTextField
            // Qt 5.8
            // only if set to true we can mark words by double tap
            selectByMouse: doubleTapIsDefault
            // important - otherwise text goes endless without wrapping
            width: parent.width
            text: ""
            wrapMode: TextArea.WordWrap
        } // theTextField
    } // text pane
    Column {
        spacing: 0
        anchors.top: textPane.top
        Layout.minimumWidth: textClearButton.visible || textSelectToggleButton.visible || textDoneButton.visible? 48 : 0
        ButtonIconActive {
            id: textClearButton
            anchors.horizontalCenter: parent.horizontalCenter
            visible: theTextField.activeFocus || theTextField.text.length
            focusPolicy: Qt.ClickFocus
            imageName: "clear.png"
            onClicked: {
                theTextField.text = ""
            }
        } // textClearButton
        ButtonIconActive {
            id: textSelectToggleButton
            anchors.horizontalCenter: parent.horizontalCenter
            visible: theTextField.activeFocus
            focusPolicy: Qt.ClickFocus
            imageName: "code.png"
            onClicked: {
                theTextField.selectByMouse = !theTextField.selectByMouse
                if(theTextField.selectByMouse) {
                    appWindow.showToast(qsTr("Word Selection by Double Tap switched ON"))
                } else {
                    appWindow.showToast(qsTr("Word Selection by Double Tap switched OFF"))
                }
            }
        } // textSelectButton
        ButtonIconActive {
            id: textDoneButton
            anchors.horizontalCenter: parent.horizontalCenter
            visible: theTextField.activeFocus
            focusPolicy: Qt.ClickFocus
            imageName: "done.png"
            onClicked: {
                // we only need the focus
                // emit signal so users can give another field the activeFocus
                theTextRow.done()
            }
        } // textDoneButton
    }
} // row w text area

ButtonIconActive is a customized Button showing Icon. You’ll find all of this in my sample apps at Github – I also have updated QtWorldSummit Conference App.

On Android there are two bugs:

Selection handles overlap while scrolling (Android only)

The selection handle(s) can overlap the keyboard or selection menu:

Take a look at BUG 58700

Selection Handle visible when Component invisible

If the Component containing your TextField or TextArea becomes invisible and the TextField still has active focus, the handles will still be visible.

See BUG 58700

Workaround is easy: set focus to another field as soon as TextField becomes invisible.


← Back (Update 5.7 to 5.8)

→ Next Article (Qt Creator – Intro)

⇐ Home (Overview / Topics)


Before debugging and running a work APP on your managed Android device from Qt Creator

  • your device must be activated as Android for Work device
  • your must have sent a release build to your Admin and this APP must be published to Google Play for Work
  • you must have installed the work APP on your managed device

Deploy to Device

Build and deploy your APP as usual from Qt Creator to your (managed) Android device.

Hint: Deploying the APP from QtCreator the first time you’ll get this info:

YES will delete the installed work app and install your APP. If installing fails, then probably the APP is marked as ‘required’ – ask your admin to set the APP as ‘optional’ to be able to delete the APP.

If all works well, the APP (named PegelMeter) will appear twice on your device.

This is expected behavior – read more here – topic “Testing on managed profiles – tips and tricks“.

Run the work APP

Unfortunately you’ll notice that Qt Creator runs the private version of the APP and not the work version.

This is because Qt Creator doesn’t know that we want to run a work app. Private and Work apps are bound to the user.

Work User vs Private User (managed Android Device)

Default user is user 0, where the work user normally is user 10. You can list your users from Terminal:

adb shell pm list users

you’ll get something like this:

Users:
    UserInfo{0:1799924875:13} running
    UserInfo{10:141078676:30} running

User 0 –> default (private) user

User 10 –> work user

Run as Work App

You can run the APP from Terminal as Work APP:

adb shell am start --user 10 -n org.ekkescorner.xxx.pegelmeter.dev/org.qtproject.qt5.android.bindings.QtActivity

QtCreator starts the APP without –user which always will use the default one (0)

I’ll open a bug report and request to add a Variable USER_ID so this can be placed inside .pro and added to adb start command by Qt build process.

Starting the work APP from Terminal you’re loosing the log output inside QT Creator. Workaround could be to log from adb or to use an extra tool.

This will give you the logs using adb:

adb -d logcat libpegelMeter_x.so:D *:S

A special tool gives you some more comfort filtering the logs. For OSX I can recommend LogRabbit. It’s easy to filter out the logs from your APP.

External Tool

As we have seen, Build and Run the APP starts the private APP.  So you have to stop and close the private APP and then start the work APP from Terminal.

To make this easier I added this to External Tools in Qt Creator:

I checked Output: Show in Pane – but nothing is printed. Probably I forgot something to tell External Tools that APP output should be visible in Application Output Pane. As long as this doesn’t work I’m using LogRabbit (see above)

External Tools ‘start_pegelmeter_work.sh’ executes this script:

#!/bin/sh
cd <path-to->/platform-tools
./adb shell pm clear --user 0 org.ekkescorner.xxx.pegelmeter.dev
./adb shell am start --user 10 -n org.ekkescorner.xxx.pegelmeter.dev/org.qtproject.qt5.android.bindings.QtActivity

Now it’s easier:

  • Build and Run APP
  • ExternalTools – Kill running private APP and Start Work APP

I would like to use a variable for User Id and also for APP Name and APP Package. (see QTCREATORBUG-17863)

and here’s the request to add USER_ID to be placed inside .pro: QTCREATORBUG-17862


← Back (Deploy Android Work App to Google Play)

→ Next Article (…work in progress…)

⇐ Home (Overview / Topics)